
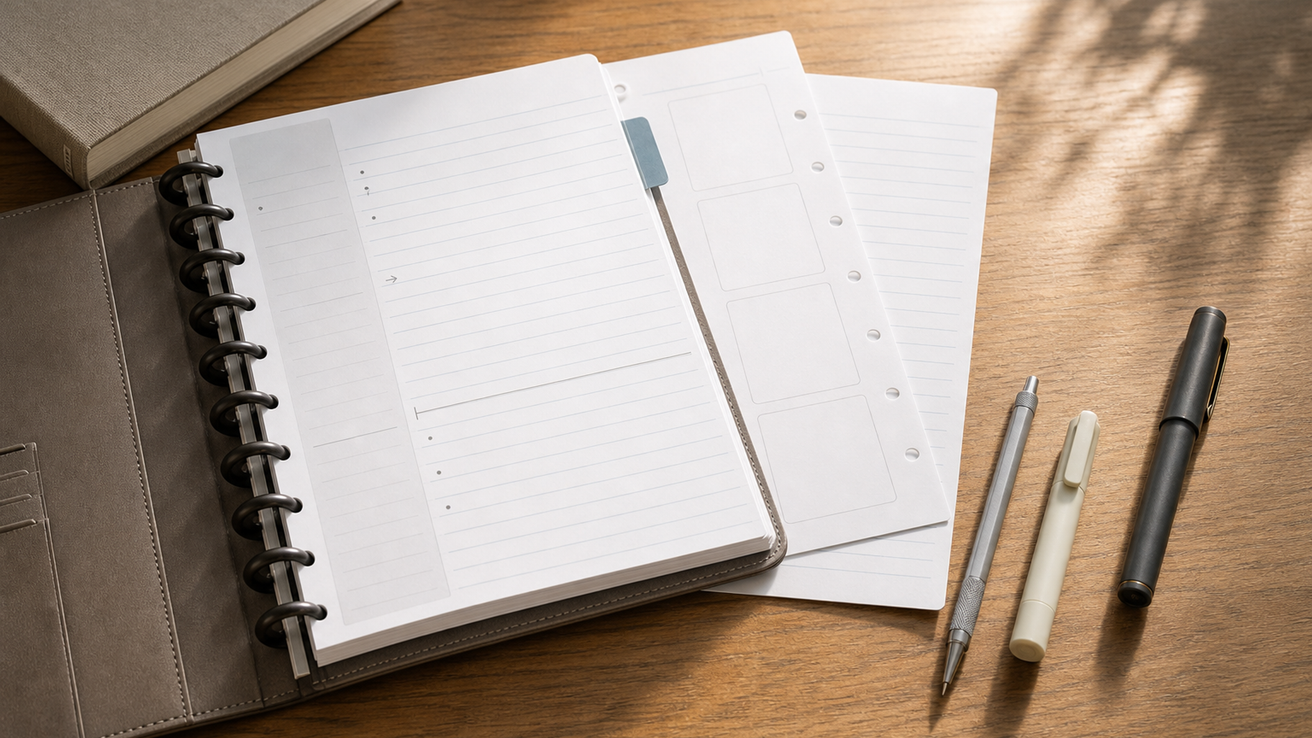
The best student setup is a single notebook with three working page types you can rearrange: a lecture page, a reading page, and a question page. Keep all three for every course, and move pages where the study plan needs them. A discbound format makes the movement effortless; the method below makes the movement meaningful. Levenger’s Circa system is a refined yet surprisingly cost‑effective route into this approach, and seasonal promotions plus the loyalty program often make it an even better value.
How to organize study notes on paper
Organize by course first, then by page type. Each course gets a tab. Behind each tab, keep three interleaved streams—Lecture, Reading, Questions—so you can promote what matters into review without rewriting your entire notebook.
The page templates to use
Lecture page: date, topic, and a wide body for fast capture. Use a left margin to flag cues as you go.
Reading page: claim in the margin, page reference to the textbook, and a brief paraphrase you could defend out loud.
Question page: three potential exam questions per class meeting, with room for an outline answer you’ll flesh out later.
Set the sections once, then follow this daily flow
- Create course tabs: one tab per course. Behind each tab, insert 10–20 lecture pages, 10 reading pages, and 5 question pages to start.
- Before class (2 minutes): title the next lecture page with date and topic. Pre‑draw or rely on the printed margin for cues like “def,” “ex,” and “vs.”
- During class: capture what is said on the lecture page only. In the left margin, mark quick prompts (see Annotation scheme below) so you can find ideas later.
- Right after class (5–7 minutes): flip to a question page and write exactly three likely questions from that lecture. Under each, bullet the 3–5 facts you’d need to earn full credit.
- That evening: add a reading page for the assigned chapter or article, recording claims and page numbers (do not copy the text).
- End of week (10 minutes per course): move the week’s strongest question pages to a consolidated “Exam” section at the front of the notebook.
Start here: a quick, flexible student build
Begin with a simple, complete foundation you can expand as your term intensifies. The two items below deliver a functional, rearrangeable notebook on day one and make it faster to reach the right page on day two. The cards that appear show live availability and options; add what fits your schedule and campus carry.
- All‑in‑one, fast‑start setup: Circa Discbound Notebook Starter Kit — translucent covers, discs, dividers, a Page Finder, and a mix of ruled and annotation pages so you can build sections by course without hunting for components.
- Today marker and course anchors that shave seconds off every study block: Circa Page Finder Tabs — snap‑in tabs you park at the next blank lecture page and reuse as term‑long markers.
Recommended paper with a margin you don’t have to draw
Circa Shaded Annotation Ruled Refill (100 sheets) has a printed annotation column compatible with Cornell‑style note‑taking and uses substantial, archive‑quality paper that resists feathering and show‑through. The pre‑ruled margin saves setup time and standardizes your pages.
Mark what’s current
Circa Page Finder Tabs make today’s lecture and this week’s reading instantly reachable. Park a Page Finder at the next blank lecture page and use the numbered tabs as term‑long anchors for each course.
Want a deeper build?
For complete layouts students use, see Setups for Students & Lifelong Learners, and for how the entire Circa ecosystem fits together, see The Complete Circa Productivity System. If you are deciding between notebook formats, compare systems here: Disc‑bound vs ring binder vs bound notebook.
A paper system for exam review
Review by answering, not rereading. Promote your question pages to an Exam section, then write fresh answer pages from memory, compare to your lecture pages, and file the corrected version ahead of the originals. This keeps your best understanding on top and your earlier drafts nearby for reference.
The rewriter’s alternative
If you normally recopy because you can’t insert, keep the original page in place. Write your second pass on a fresh sheet and move it to where it belongs—directly in front of the source lecture—so your best version is always the first thing you see. Rewriting is worthwhile when you are generating new structure or condensing; it’s wasted effort when you are copying without change.
Weekly practice cycle (during the term)
- Collect: move the week’s question pages into the Exam section.
- Answer from memory: for each question, write a new answer page. Keep it to one page per question.
- Check and correct: compare to your lecture page and reading page. In the margin, flag what you missed.
- File for spaced review: place corrected answer pages in order of weakest to strongest so the tough ones stay at the top of the stack.
- Promote key diagrams: redraw any diagram on blank paper and file it immediately ahead of its related answer page.
Dated countdown to exam day (U.S. semester pacing)
- Four weeks out: build a master list of 15–25 questions for the course by merging your weekly question pages. Block two 45‑minute sessions per week to answer three questions per session.
- Two weeks out: switch to mixed practice. Shuffle question pages from different weeks so each session covers three topics. Add quick oral recalls: explain an answer out loud before you read your page.
- Seven days out: compress. For each answer page, boil the argument to a five‑line skeleton in the margin. Move skeleton pages to the very front of the Exam section.
- Three days out: run timed sets: 3 questions, 15 minutes each. Mark any gaps with a “Δ” in the margin and patch them from lecture or reading pages.
- Evening before: scan only skeletons and diagrams. Sleep. In the morning, read the top five weakest pages and walk to class.
Fast add‑ons that accelerate exam prep
When exam season stacks handouts and practice sets on your desk, make sure they live inside your system instead of on top of it. The pairing below keeps your exam section current and portable.
- Margin‑printed lecture and reading pages you can trust for heavy ink: Circa Shaded Annotation Ruled Refill (100 sheets) — pre‑ruled for a Cornell‑compatible margin, with substantial paper that holds up to daily review.
- Single‑sheet adds that keep handouts with the right topic: Circa 1‑2‑3 Portable Punch — a compact punch you can carry to the library and use to file printed rubrics or professor handouts beside the relevant questions.
An annotation system for textbooks
Use a fixed, small set of marks so your reading turns into revision material automatically. Your margin note should be the claim you’d quote or dispute, plus the textbook page number to find it fast.
A compact mark set you can learn in five minutes
- • = key fact to memorize (write the keyword in the margin)
- ? = professor’s likely quiz point (turn into a question page later)
- ⟂ = definition (write “def:” and the term in the margin)
- → = cause/effect or proof step (note the link in 3–5 words)
- ≠ = contrast with earlier idea (name both sides)
- Pg#: always write the textbook page number beside your margin claim
How to extract reading into notes the same day
- Read with marks: highlight sparingly, but always translate highlights into a margin claim plus page number.
- Transfer selectively: for each marked spread, create one reading page entry: write the claim in the margin, a 1–2 sentence paraphrase in the body, and the source page (e.g., “p. 213”).
- Promote questions: any “?” marks become lines on the next question page.
- Tab the chapter: place a Page Finder at the current chapter start so lecture and reading stay aligned.
Tools that speed annotation
Circa Shaded Annotation Ruled Refill gives you a ready left column for claims and page numbers, which is faster than drawing a margin every time. To keep your place between lectures and chapters, add Circa Page Finder Tabs.
For a deeper walkthrough of reading‑annotation‑review flows, see Setups for Students & Lifelong Learners.
A paper system for a research project
Run two streams—Sources and Claims—and keep quotations physically separate from paraphrases. Work on one source or one claim per page so you can regroup pages by theme without rewriting. This approach is durable across disciplines, from lab reports to literary analysis, because the structure follows the argument.
Build the notebook structure
- Create five tabs: Inbox, Sources, Claims, Outline, Draft. Inbox holds raw captures; everything else is processed.
- Set your capture rule: one source per page; one claim per page. Never mix them.
- Color cues: use a single highlighter color only for verbatim quotes and write “Q:” at the start of each quote line. Use normal ink for your paraphrases and write “P:” before each paraphrase. You’ll be able to tell them apart three months later.
How to capture a source (one page per source)
- Header: Author, year, title, publisher/journal, URL or DOI if applicable.
-
Extraction: in the body, make two clearly labeled blocks:
- Q: “…” Copy exact lines you might cite; always add the page number in the margin.
- P: Your paraphrase of the author’s point in 1–3 sentences; add a margin tag for themes (e.g., “method,” “limit,” “case A”).
- Back‑of‑page checklist: relevance (yes/no), strength (A/B/C), and how you might use it (intro, counter, proof, example).
- File: move the finished page behind the Sources tab.
How to turn sources into claims (one page per claim)
- Draft the claim: write one sentence you’re willing to defend.
- Attach evidence: list the Source page IDs that support or challenge the claim (e.g., “S12 p. 213; S7 fig. 2”).
- Keep quotes separate: if a quote is essential, copy it under a “Q:” block on the claim page and underline it to warn your future self it’s verbatim.
- Tag by theme: add 1–2 margin tags (e.g., “cost,” “ethics”) so you can regroup later.
- File: move the new page into the Claims tab.
Regrouping when your argument changes
- Spread the Claims pages on a desk: cluster by your margin tags into piles (e.g., “theory,” “method,” “results”).
- Reorder physically: pick the sequence that best tells the story and stack the pages in that order.
- Promote to Outline: move the stack into the Outline tab as sections I, II, III… Drop the supporting Source pages immediately behind each section so evidence travels with the point.
- Revise by moving, not rewriting: if a claim moves from II to IV, lift the page and move it. The discbound format makes this painless—no tearing, no recopying.
Bring outside pages into the same book
Circa 1‑2‑3 Portable Punch lets you add a single printed article or handout directly into your project tabs, so evidence and outline stay together as you write.
Notebook paper for studying
Use annotation‑ruled for lectures and reading, blank for redrawable diagrams, and grid for problem sets—kept as separate refills so disciplines don’t collide on the back of a page. Levenger paper is engineered to be fountain‑pen‑friendly and highlighter‑safe, which means fewer bleeds and a cleaner archive when you revisit material later in the term.
Weight, ruling, and tool compatibility—honestly
- Annotation‑ruled: The shaded annotation refill above uses substantial, archive‑quality paper with a printed margin. It is designed to minimize feathering with rollerball and fountain pen inks and to reduce show‑through when you write on both sides.
- Blank: Keep a small stack for concept maps, timelines, and redrawable figures, especially in courses where diagrams turn into points on an exam. File the best version in front of the related answer page in your Exam section.
- Grid: For quantitative courses, use grid pages to keep arithmetic and diagrams aligned. When a proof or problem set becomes a study anchor, promote that sheet to the Exam section and tag it with a margin cue so you can find it in seconds.
Two high‑leverage upgrades most students appreciate
- Margin‑printed pages that remove friction: Circa Shaded Annotation Ruled Refill (100 sheets) — consistent headings for subject and date help you scan quickly during review.
- A fast, physical “Go to today” tool: Circa Page Finder Tabs — slide one to “Lecture—Today” and another to “Exam—Work in Progress.” Small changes in reach time add up across a semester.
Carry, size, and schedule: what fits life on a U.S. campus
Letter vs. Junior: Letter (8 1/2 x 11) makes printing and handouts easy; Junior (5 1/2 x 8 1/2) is compact for a backpack already carrying a laptop and a lab manual. Choose once per term and commit—mixing sizes halves your spare pages and complicates your carry.
One notebook or many? One per term with strong tabs is faster in practice. A single book means one habit: open to today’s lecture. If your course load is unusually heavy or you commute between campus and work, consider one book for STEM and one for reading‑heavy courses, but keep the page templates identical.
Schedule realities: In the United States, most semesters run 14–16 weeks of instruction. Build a weekly rhythm that acknowledges labs, studio hours, or clinical rotations. Keep review blocks earlier in the day when campus is quieter; use evenings for lighter annotation transfer.
For new students and transfer terms: the simple, fast path
Start small: one notebook, one set of tabs, and the three page types. Levenger’s quality makes the daily habit rewarding—the paper feels good, inks behave, and the discs make edits painless—yet the entry cost can be quite reasonable, especially when bundled or on promotion.
Maintenance: keep the system light and current
Weekly, reflect and prune. Move solved problem sets behind a Backfile tab, promote only the best answer pages to Exam, and archive any pages that no longer serve your next quiz. A two‑minute tidy at the end of each library session prevents the dreaded midterm pile‑up.
Quick fixes when pages snag or drift
- Disc snag at the top: flip pages forward rather than backward when the book is full; a forward roll aligns the mushroom holes more cleanly.
- Edge wear: rotate heavily used pages to the center discs so tension is distributed.
- Punch alignment: for single sheets, a portable punch helps you re‑punch a worn hole and rescue a page you’d rather not recopy.
Small accessories that save big time
- File handouts instantly so they’re never lost in a backpack: Circa 1‑2‑3 Portable Punch — sized for one‑sheet tasks and light enough to live in a study tote.
- Park a finger on the right page before the lecture starts: Circa Page Finder Tabs — treat the numbers as course IDs for the term so navigation becomes muscle memory.
For the student who already owns everything
When your shelves already hold refills and discs, the next gains come from process. Two ideas tend to produce outsized results in advanced courses: a stricter “answer from memory” habit and an aggressive habit of promoting pages to the Exam section the same day you create them. Add one structural upgrade—an always‑on “Current Set” at the front of the book—so brainpower goes to content, not logistics.
The “Current Set” method
- Front‑load three slots: Lecture—Today, Reading—Today, Exam—Work in Progress. Keep one Page Finder on each slot.
- End every block with a move: slide one page forward to Exam or backfile it. No session ends without a decision.
- Open with review, not setup: when you return, the Page Finder on Exam—Work in Progress puts the right unfinished answer on top.
To go deeper into system‑level refinements, explore The Complete Circa Productivity System for patterns that scale from semester to graduate research.
FAQ: The Best Notebook Setup for Students
Is discbound really better than bound notebooks for students?
For most students, yes. The ability to move pages—without tearing or re‑punching spiral holes—means you can promote the best material into an Exam section and keep related diagrams and readings together. It’s the same notebook all term, continuously improving.
Junior or Letter for lectures?
Lecture‑heavy majors that rely on printouts often prefer Letter so handouts slot straight in. If your bag rides all day and campus is spread out, Junior is easier to carry between classes. Choose the size that reduces friction in your real schedule.
Do I need special paper for the Cornell method?
You can draw a left margin by hand, but annotation‑ruled paper with a shaded margin removes setup time and keeps your pages consistent for scanning during review.
How do I keep multiple courses straight in one book?
Use one tab per course and interleave Lecture, Reading, and Questions behind each tab. Park Page Finder Tabs at “today” for each course so you can arrive, open, and write without hunting.
What if a professor posts problem sets online?
Print them and use a portable punch to add the sheet in front of the related lecture. After you complete the set, promote the final, clean version to your Exam section so it’s the first page you see.
How does levenger.mompare on cost?
Levenger designs for longevity—substantial paper, durable discs, and covers that last—but entry kits and refills are often more cost‑effective than students expect, especially during sitewide promotions. Loyalty rewards add further value over a multi‑term academic career.
Make your first move
Build your student notebook today with a starter kit and one margin‑printed refill, then add tabs and a portable punch once the syllabus lands. This is a refined system you can live in all term—high quality where it matters, cost‑effective where it counts, and frequently available with great deals.
- Begin with the simple build you’ll actually use this week: Circa Discbound Notebook Starter Kit — start with the size that fits your carry.
- Add the two upgrades that keep you moving: Circa Shaded Annotation Ruled Refill and Circa Page Finder Tabs — a margin that guides study and a tab that points to today.
- Be ready for handouts and printouts on day one: Circa 1‑2‑3 Portable Punch — keep your system whole when professors surprise you.
Conversion tip: Add personalization where offered and allow two business days for processing before shipping. That small lead time yields tools that feel uniquely yours—and tools you enjoy using are the ones you’ll use consistently.


